Assembly Manual

Heat-Kit System

Modular Contraflow Masonry Heater Core

Masonry Stove Builders
RR 5 Shawville Québec J0X 2Y0
Voice 819.647.5092
Fax 819.647.6082
email mheat@hookup.net

last modified: July 6, 1996

Assembling the Bottom End

The bottom end of a contraflow heater is the most complicated part of the whole job. The two downdraft channels connect here, underneath the firebox. As well, the chimney connection and the cleanout openings for the particular installation need to be determined and located here.
We've removed as much of this complication as possible with the Heat-Kit system. The insulated base slab allows you to do a dry layout first and make sure that everything is located properly in relation to the chimney and the slab. As well, our thinwall refractory castings simplify the job of making the necessary cutouts with a portable masonry saw or a skilsaw. If you take a little extra time at this stage, particularly with the layout, you'll avoid problems later on.
The drawings below indicate a single base slab, but we are currently still using the standard (18" firebox) base slab with a 4 ½" extension piece added on.

Position insulating base slab dry to determine layout for heater and chimney. For 22" firebox, base slab requires 4.5" extension piece (supplied). Mark final position at corners with a pencil.
Install insulating base slab level onto a mortar bed.

Add 4-1/2" extension piece, using a dry (tight) headjoint.

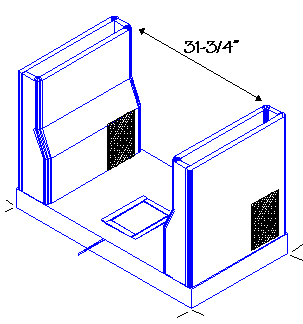
Before setting base channels, cut appropriate holes for chimney connection and for clean outs. In this example, a right side chimney and front channel cleanouts are shown.

Set base channels dry as shown. Bottom seam will be sealed later by mortar slush between channels and facing.

(Right channel not shown for clarity)
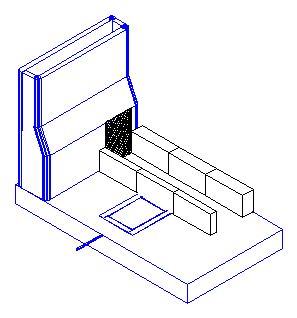
Build connecting channel.
(If there is a rear chimney, leave opening and span with flat bar supplied (notch bricks to maintain thin joints)).
Firebrick shiner is flush with outside of slab. Firebrick split shiner is set to form a 6-1/2" channel.
(Note: "shiner" = brick set on edge)
Form connecting channel ceiling as shown.
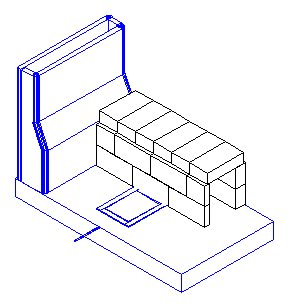
Sponge inside of channel to remove hanging drips.
Fill any large gaps between bricks and lower channel with regular mortar.
To form support for firebox floor, build up fill as shown to same height as firebrick. Arrow indicates approx. 8" channel for ashes.
Install 14" flatbar as shown to provide extra support for firebox floor. Use mortar joint to gain height
Install firebox floor onto generous mortar bed and level accurately.
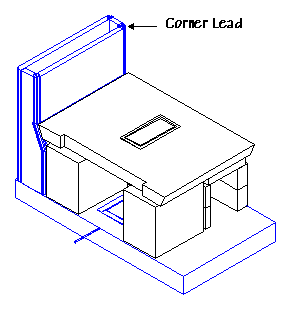
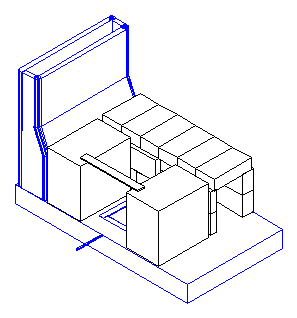
Back corners of floor line up with leads that are precast into lower channels.
Ensure full mortar bed between flat bar and floor.
You are now ready to build the firebox.