
![]() Heat-Kit
Heat-Kit ![]() Bakeoven Page
Bakeoven Page ![]() Gallery
Gallery ![]() Links
Links
![]() Library
Library
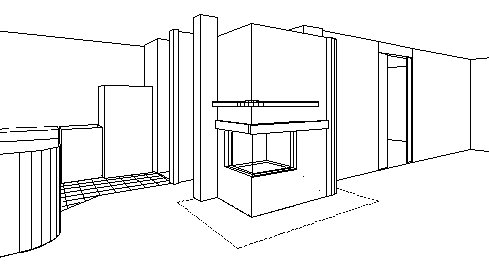
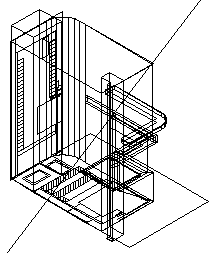
Description:This is a custom masonry heater for a new infill house in downtown Ottawa, and is designed to be the main heat source for the house. It features a corner ceramic glass window on the living room side, and a separate loading door in the hallway. It is finished with local Kingston ledgerock (sandstone). |
We documented the construction with a
Kodak DC-50 digital camera, and posted images to this
page as the construction progressed
|
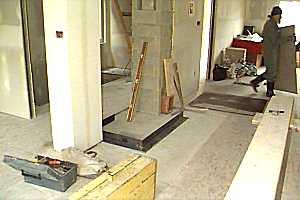 |
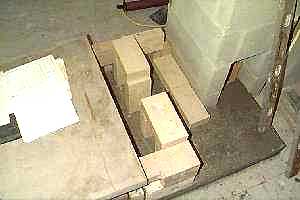
Tuesday April 8: The foundation is in and the chimney is built (the brown 4 ft. level is leaning against the chimney) |
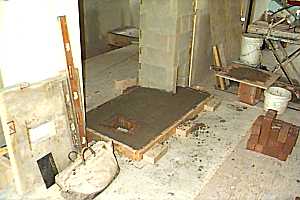 |
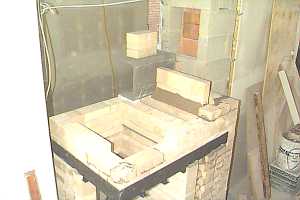
The heater core will sit on the insulating base pad, which has just been poured, using a vermiculite/portland mix. The cutout in the pad is for outside combustion air supply and as an ashdrop into the basement foundation ashpit. |
 |
Wednesday April 9 Supporting structure for firebox floor includes air channels for combustion air and airwash for doors. |
 |
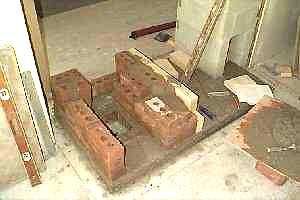
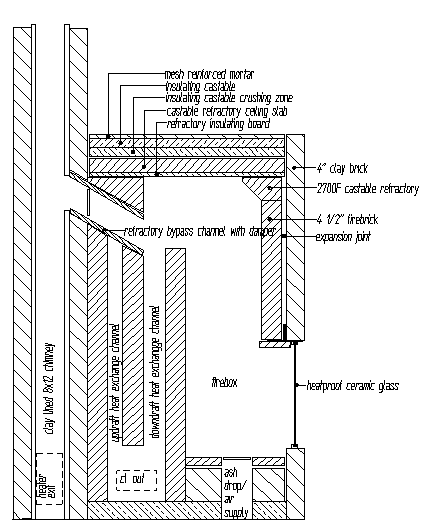
Precast firebox floor is installed. To the right is a downdraft heat exchange channel followed by an updraft channel. The crossover between the two channels is visible. A third channel will downdraft and exit into the chimney opening visible to the right, at floor level. |
 |
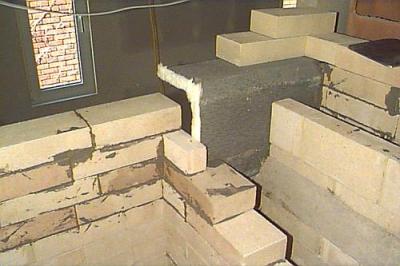
Thurday April 10 The two heat exchange channels are up to the top of glass door height. The two white strips are ceramic fiber expansion joints |
 |
The firebox walls are up to the top of loading door height. The ashdump is visible in the firebox floor |
 |
View from the loading door side. The slot at the front of the firebox floor will become the combustion air inlet. |
 |
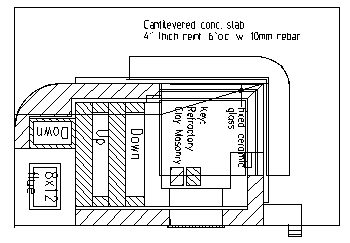
Friday, April 11 Loading door lintel is in place. Welded cantilevered lintel assembly for corner glass window is installed onto a levelling bed of castable refractory. The brackets welded to the bottom of the lintel are for slide-in heat shields (1.25" thick firebricks) |
 |
Warming oven is installed at far corner. It is cut
from a piece of 8x12 Reftratco refractory concrete flue
liner. Immediately above is the chimney connection for
the bypass damper. Note that the heat exchanger partition wall has been thinned to 2.5" to provide extra cross sectional area at the start of the downdraft channel. The transition is faired with castable refractory. Check back here on Wednesday night - the core should be done and ready for the sandstone facing! |
 |
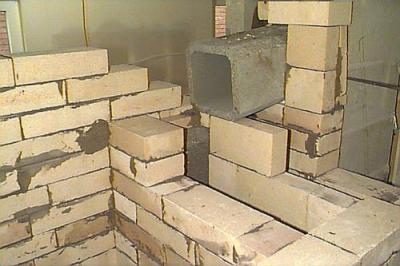
Tuesday, April 15 Detail of ceramic fiber gasket/expansion joint between warming oven and firebox. On the cooler chimney side, this joint is made with G.E. Silicone (600F). Note hole cut in red chimney flue at top right for bypass channel connection. |
 |
Detail of bypass with sliding damper. Bypass channel is heatproof Reftratco brand 8x8 flue liner. Note gasket under channel at back. |
 |
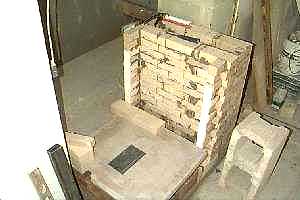
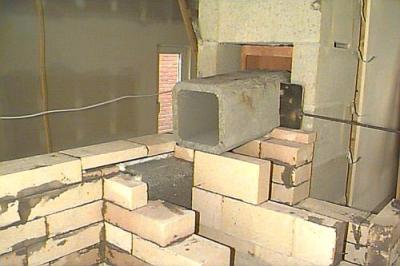
Firebox exit (bagwall) is at final height. Note 2 brick step on left that protects warming oven from direct flame impingement. To the right of the bypass at the back is the top exit hole from the updraft (second) channel, into the final downdrafting 8x12 Refratco flue channel (not installed yet). |
 |
Wednesday, April 15: Main heater core is finished. Precast refractory firebox ceiling slabs are in place. They are faced on the hot side with rigid high temperature insulating board |
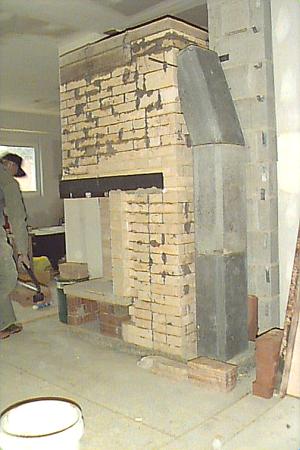 |
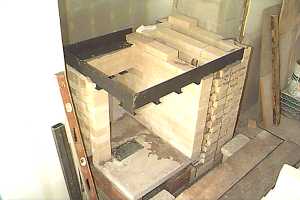
Final downdraft run is constructed from 8x12 Reftratco heatproof flue liners. |
 |
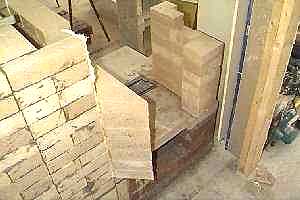
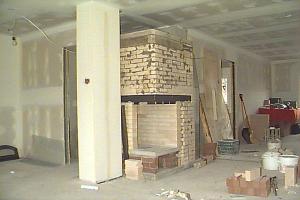
View from hallway side. Check back towards the end of next week, when we start the sandstone facing. Thurs. April 24: Update: Sandstone facing starts tomorrow. |
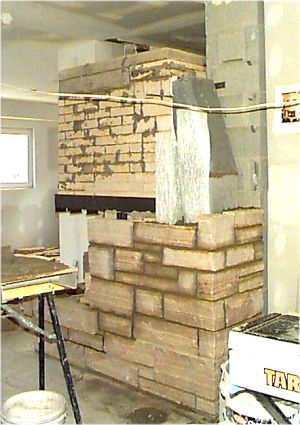 |
Tuesday April 27: Sandstone facing in progress |
 |
Thursday May 1: Working on the hallway side. |
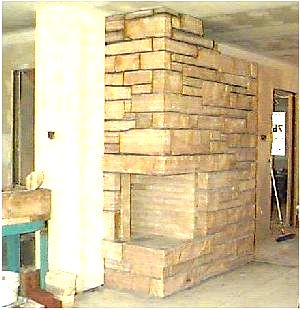 |
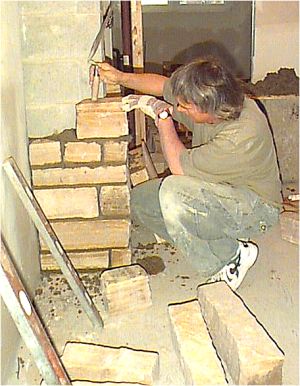
Friday May 9: More stone. The stone was not planned originally, and required a lot of cutting because of extra corners that were created. Also, some stone needed to be ripped thinner on a diamond saw due to clearance problems. The clent's finish requirements on the living room side were also fairly exacting. The result - lots of labour, 80 hours (2 man crew), so far. |
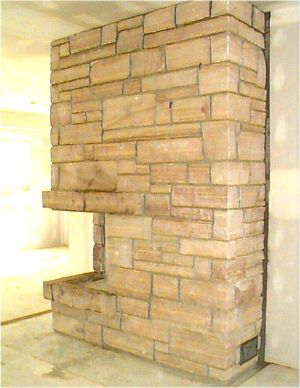 |
Thursday May 14: Finished stone - total labour on stone was 95 hours. Will install custom ceramic glass corner window later. |
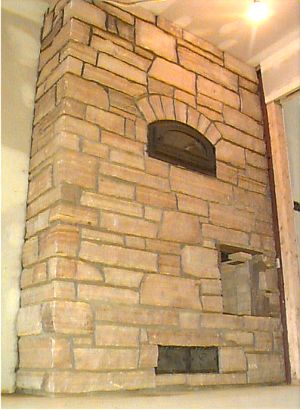 |
View from hallway side, coming up basement stairs. Warming oven door is installed. Loading door will be installed in opening to the right. At bottom are two cleanouts for heat exchange channels |
 |
 |
 |
|
![]() to Recent Projects Page
to Recent Projects Page
![]() to Masonry Stove Builders
to Masonry Stove Builders