
|
|
Heat-Kit | Gallery | Brick Oven Page |
|
Bookstore | Library | Masonry Heater Mall |
|||
| Current Projects |
Contact | Search | Links | FAQ |
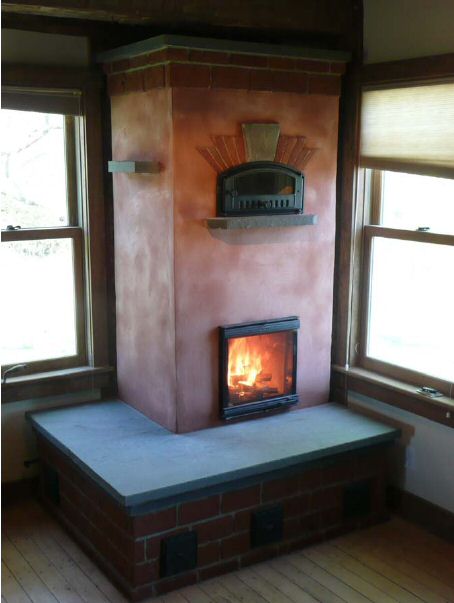
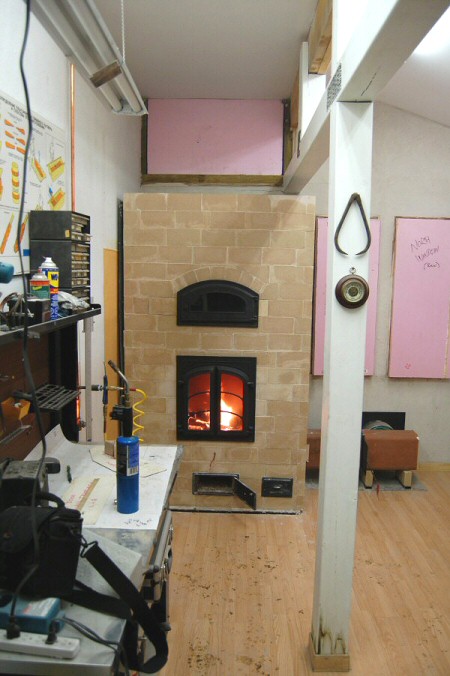
Heater by William Davenport
This refers to a quick method of facing the heater using firebricks on edge
(a brick on edge = a shiner). It was pioneered by William Davenport, and
he has written a very informative article describing his technique. It is probably
the most accessible method for a homeowner who wants to face his/her own
heater.
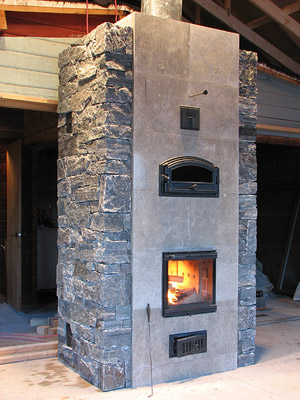
As part of our testing in 2006, we built a Heatkit core at Lopez Labs and
faced it with firebrick shiners. The entire core and facing was built by a
non-professional mason, to see if there would be any problems.

Minimum cut brick bonding pattern for 4.5" x 9" x 2.25" firebricks.
Only half cuts (bats) are required.
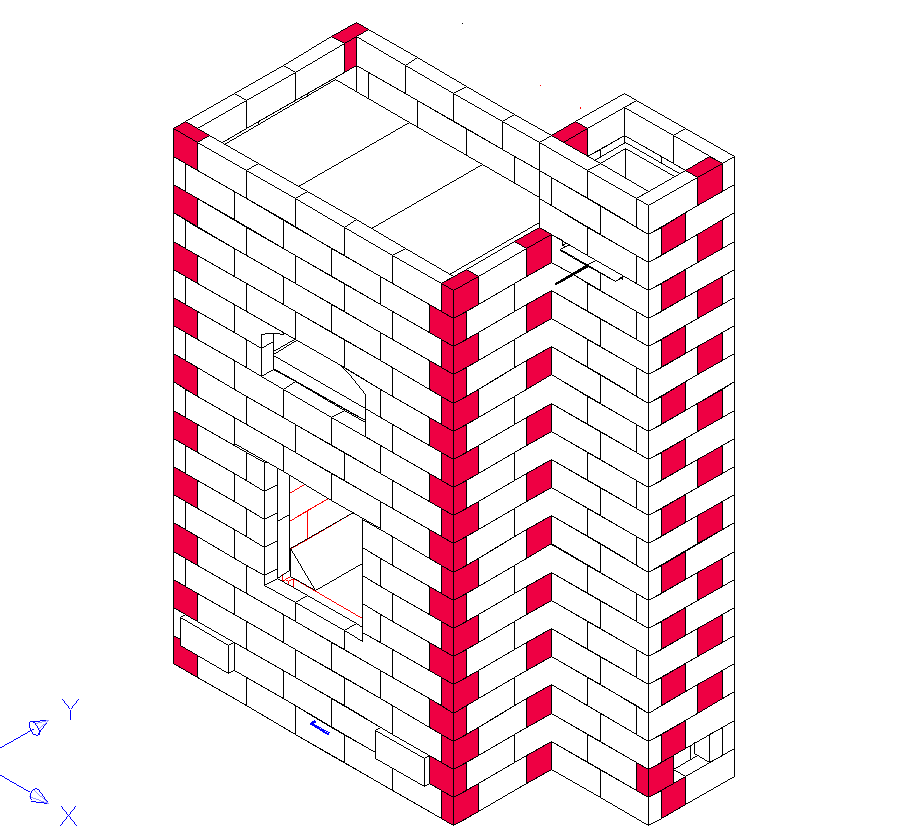
Client file from a similar layout, showing half cuts.
Note the firebrick dams at the side of the door openings to contain the slush.
Dams around cleanouts, etc., can be fabricated from sheetmetal.
The clay flue liner in the chimney should be wrapped with corrugated cardboard before
slushing.
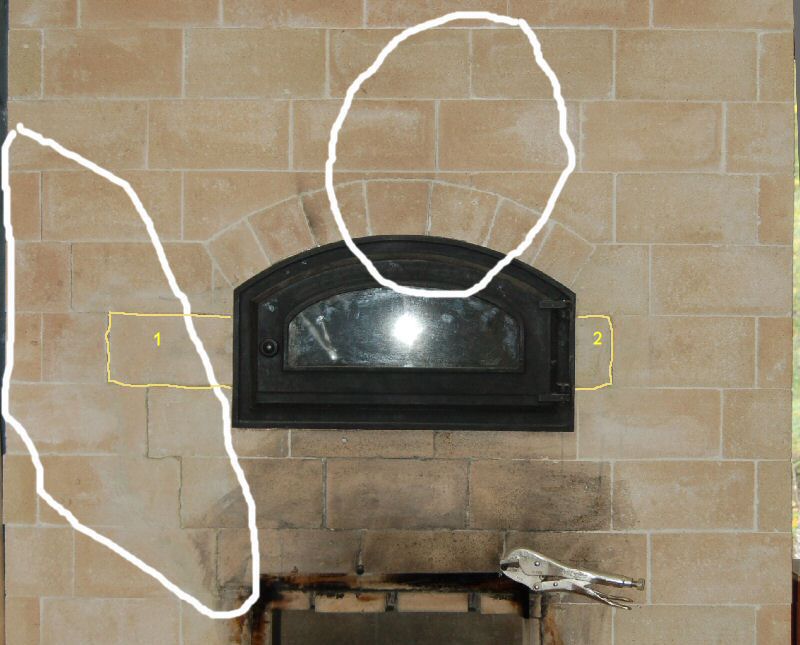
Here is the test heater after 3 winters of firing. It was overfired on purpose on some tests, with loads up to 80 lbs..
The circled areas show hairline cracks.
The bricks marked 1 and 2 were set dry, to allow experiments with the bake oven door mounting. As a result, the left hairline
followed the path of least resistance in this case. Often, this
hairline will go straight up the center, through the bakeoven opening.
1.) First and foremost, is the applied tension skin, as desribed in William's article above. A layer of EIFS glass stucco mesh
is embedded in a skim coat of thinset mortar. This provides a great backing for a clay, lime or cement plaster finish, as well as for
tile and thinstone veneer.
2.) It is obvious that the weak area is the zone just above the door
opening. It gets a lot of heat stress from the firebox below, so
that the bottom of the bricks above the opening expand faster than the surrounding bricks.
It is also where the facing is interrupted by two openings. An easy way to beef up this zone is to cast a bond beam by adding
a couple of 1/4" or 3/8" rebars in the slush space between the shiners and the core.
The slush space is fairly thick with the shiner method, so there should be 2" - 2.5" of space to work with.
Make sure the mortar is reasonably strong - premixed "mortar mix", or "sand mix" and that the rebars
are reasonably centered in the slush space. This works because reinforcing steel and concrete have the same coefficient
of thermal expansion (otherwise there would be no such thing as steel reinforced concrete).
An alternate method might be to place a sheet of 4x4 or 6x6 concrete
reinforcing mesh in the front facing slush, perhaps returning
4" or so around the corners. In this case, I'd still add a rebar in the lintel area.
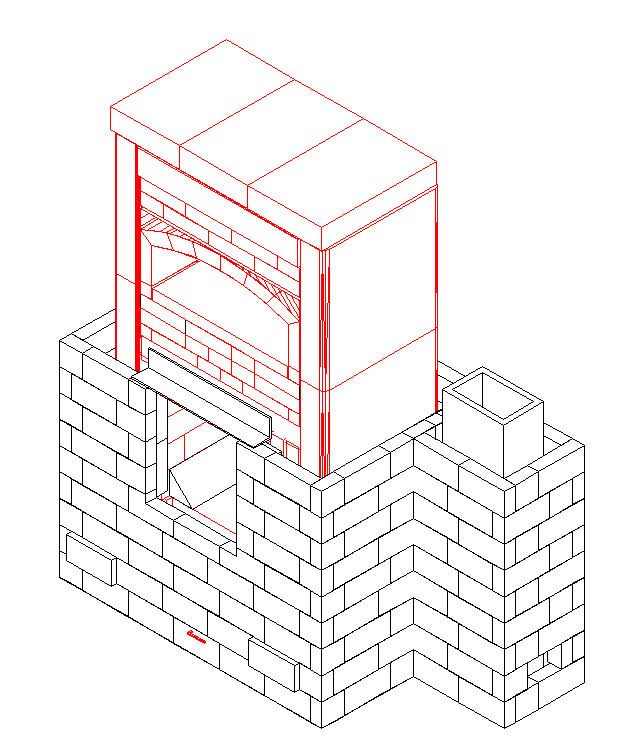
3.) Lets give it a little more insurance by adding a couple of extra expansion joints, using corrugated cardboard. Cut 8" wide
strips, and bend them into 90 degree corners, with 4" on each vertical flange. Locate them according to the drawing, below.
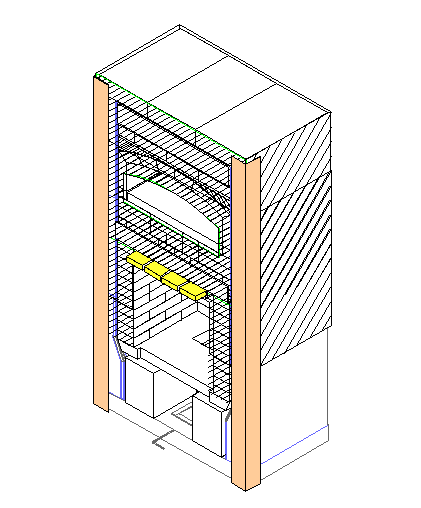
This shows the cardboard installed on top of the fiberglass wrap. It
would probably be easier to install it first, so that the wrap could
hold it in place. The firebrick split heatshields are shown in yellow.
They slide forward to protect the facing lintel, and reduce heat
transfer from the bottom.
4.) William Davenport recommends precasting a concrete lintel to
span the facing at the firebox, rather than a metal lintel and
firebricks.
This sounds like
a good idea.
5.) If using a metal lintel, be sure to allow expansion room at the ends, including where the slush is.
6.) Jerry Frisch bends a strip of sheetmetal (flashing metal) at 90
degrees, and lays it on top of the metal lintel, to act as a slip joint
for the bricks, to prevent them from bonding to the metal. Good idea.
7.) A lot of professional heater builders also insulate between the core and the lintel zone with cardboard, ceramic paper, or
ceramic blanket. It certainly can't hurt, although logic seems to say
that the extra heat is entering the lintel area from below,
not from behind. This is definitely an area where some testing wouldn't hurt.
(Update, Oct 27/08: Marcus Flynn reports a recent experiment. His heaters have a jack arch facing lintel, with no steel.
He recently fired a new heater, and noted that the lintel got quite hot. Then, he insulated the bottom of the jack arch with
ceramic blanket covered in stainless steel sheetmetal. He fired again, and noted that the arch stayed cool)
When you build a very large heater, and want to max out heating performance, sometime you get a hairline crack. Not always,
and sometimes you have to overfire the heater before it will happen. Recently there was an informative and candid discussion
of this issue in MHA News.
Here's some info on avoiding horizontal cracks, from a client who assembled the core himself and did his own facing work:
On 12/15/2008, Jon wrote:
>Hi Norbert,
>
>Something unexpected.
>Before curing I had wrapped the bottom 72" of the assembly with 2 wraps
>of 40" EIFS (4"
>overlap), leaving the top 3 shiners + 15" of air space above the heater
>waiting for the final wrap until (snip)
I'm wondering
>if curing with only partial EIFS has cause the 5 shiners in both the
>front and back top layer to separate from the course beneath due to the
>different expansion coefficients (or something). The back of the loose
>bricks are in contact with the top of the crush zone, but it seem
>detached on that side as well.
On 12/16/2008, Jon wrote:
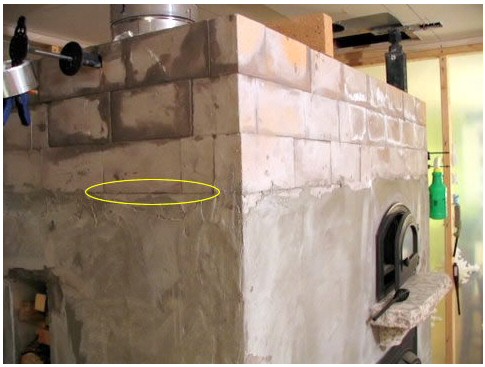
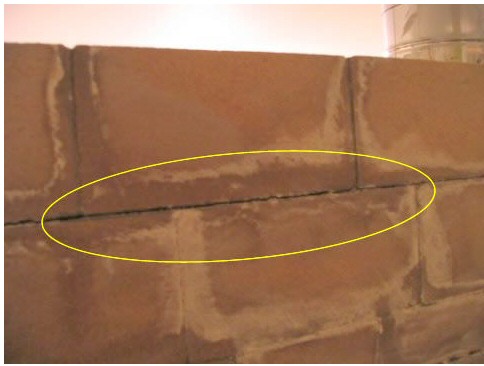
Here's a view a bit of an overall view. The bricks at the damper plate were put in last
with full strength refractory mortar, hence the different colour. A small crack developed
at the yellow oval at or around the time of the first curing:
Back of the heater. Lots of efflorescence on the top two courses, I suspect the crush
zone and/or slush mixes were on the wet side. First 5 bricks have separated horizontally,
same in the front. Vertical joints are tight:
-----------------reply follows---------------------------------------
Hi Jon:
The core is growing in height when hot (normal) and lifting those bricks
with it (happens, sometimes).
One cause, for example, would be if the slush were to contact the ceiling slab
if the fiberglass wrap slip joint didn't extend all the way to the top of the slab.
Not a big deal. Here's the fix:
- get the heater warm, which will open up the cracks. Take some metal wedges, such
as cut nails (horseshoe nails), etc., and wedge the crack in the open position.
- now finish your mesh. Make sure it overlaps.
Norbert
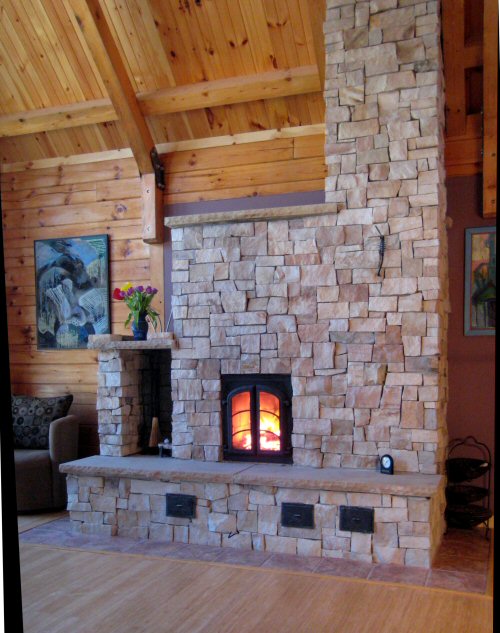
Shiner facing with thin stone veneer, by Brian Klipfel

An example of well-executed cultured stone, by Dan Pike.
This page last updated on
January 12, 2015
This page created on September 29, 2008
|
|
Heat-Kit | Gallery | Brick Oven Page |
|
Bookstore | Library | Masonry Heater Mall |
|||
| Current Projects |
Contact | Search | Links | FAQ |
Back to: